Graphic Mods and Post-Processing Tools
NaturalVision Evolved (NVE) is a graphic mod developed by Jamal Rashid, aka Razed. This mod enhances GTA V’s lighting, weather effects, ambient colours, world textures, building models, pushing the photo-realism and cinematic looks. While the mod contains settings for different hardware, it’s recommended to have a relatively powerful PC with a good graphic card. To install this mod you will also need OpenIV, a free modding toolset for Grand Theft Auto V and other games.
Installation and setup:
-
Go to razedmods.com/gta-v and download NaturalVision Evolved (6.2 Gb).
-
Go to openiv.com and download Open IV, Open ‘ovisetup’ and install Open IV on your computer.
-
Select GTA V Windows. Choose the Grand Theft Auto V folder
- C:\Program Files (x86)\Steam\steamapps\common\Grand Theft Auto V
-
Once Open IV is open, go to your file window, select the
- Tools
menu on top of the window, and select- ASI Manager
. In- ASI Manager
install all options: ASI Loader, OpenIV.ASI and openCamera. -
Select
- Tools
again and click- Options
. Click on the- "mods" folder
tab and select- Allow edit mode only for archives inside the "mods" folder
. Click- Close
. -
Select
- Edit mode
at the top right of the window. Select- OK
on the pop up window. -
Now you can add your mod to the mods folder.
-
Open the NVE mod folder, extract and select NaturalVision Installer PART ONE and drag it to Open IV. Install the file and select “mod folder” when asked to choose. After that is complete, extract and select NaturalVision Installer PART TWO and drag it to Open IV. Install the file and select “mod folder” when asked to choose. The Installers have to be executed in order: first do PART ONE, and then do PART TWO.
-
Go back to your downloads and inside the NVE folder you can choose some optional addons. Install/Uninstall them with Open IV as above. Always choose to select “mod” folder and select install.
-
Open GTA V, press
- ESC
to bring up the menu and go to SETTINGS. Adjust the graphics quality, making sure- Shader Quality
,- Particle Quality
and- Post FX
are set to. Restart the game to make changes effective. More details about installation are provided in the README file inside the NVE zip folder.

ReShade
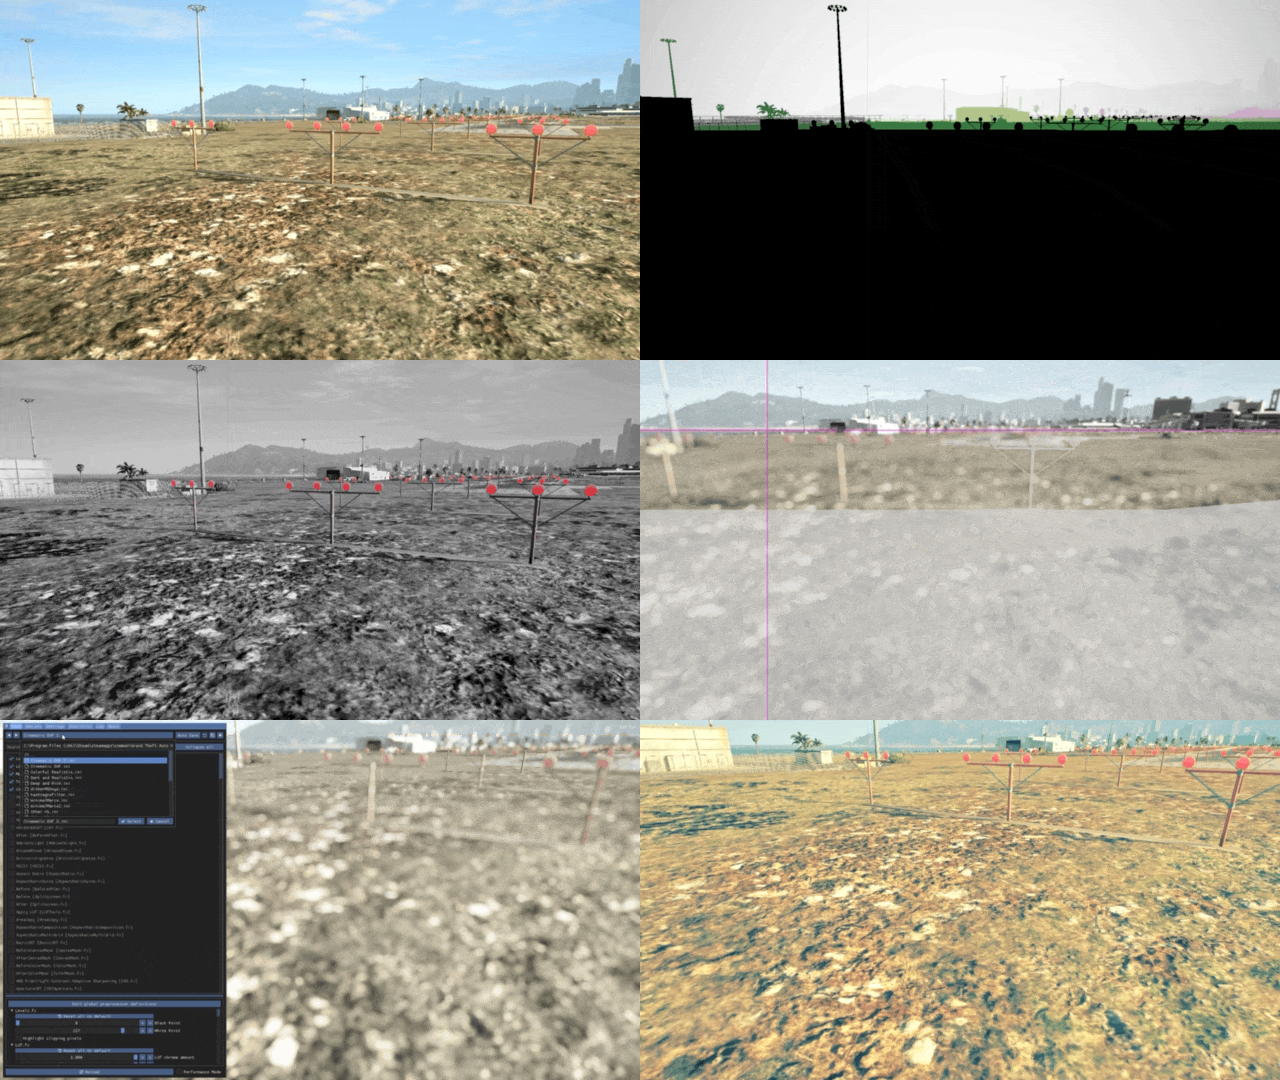
ReShade is a generic post-processing injector for games and video software developed by crosire.
Installation and setup:
-
Go to reshade.me and download the latest version
-
Open ReShade Setup and select
- Browse
and navigate to your Grand Theft Auto V folder and select GTA5.exe. Leave Direct X 10/11/12 checked and click Next. -
When asked to select presets to install, check SweetFX by CeeJay.dk and all the effect packages you want to install (OtisFX by Otis_Inf and CobraFX by SirCobra are particularly interesting for simulation of analogue photography, including depth of field) and complete installation. You can also select and install all filters, so you can play around with them all.
-
Run GTA V and press the
- Home key
to bring up the menu. The first time you bring up Reshade, it will offer to give a short tutorial on how to choose and create presets. You can use the ReShade Default preset to turn on and off all the different filters. Each filter can be adjusted by modifying its parameters at the bottom of the panel. -
Create a new preset by duplicating the ReShade Default preset and giving it a custom name. Mess around with its setting to see how it affects the visuals of the game. Thanks to different effects and presets, the aesthetics of the game world can be configured to obtain looks that are completely different from the original graphics created by the developers and designers of the game.
